Quick Overview
In this tutorial, I’ll be taking over where we left off in the previous post. I’ll be discussing SPI and I2C protocols and how to setup those in Rust, using Embassy. I’ll also show you how I solved two more challenges based on those protocols.
Setup is same as before so we’ll delve right into the challenges.
Challenges
First Task
Write some bytes to the EEPROM.
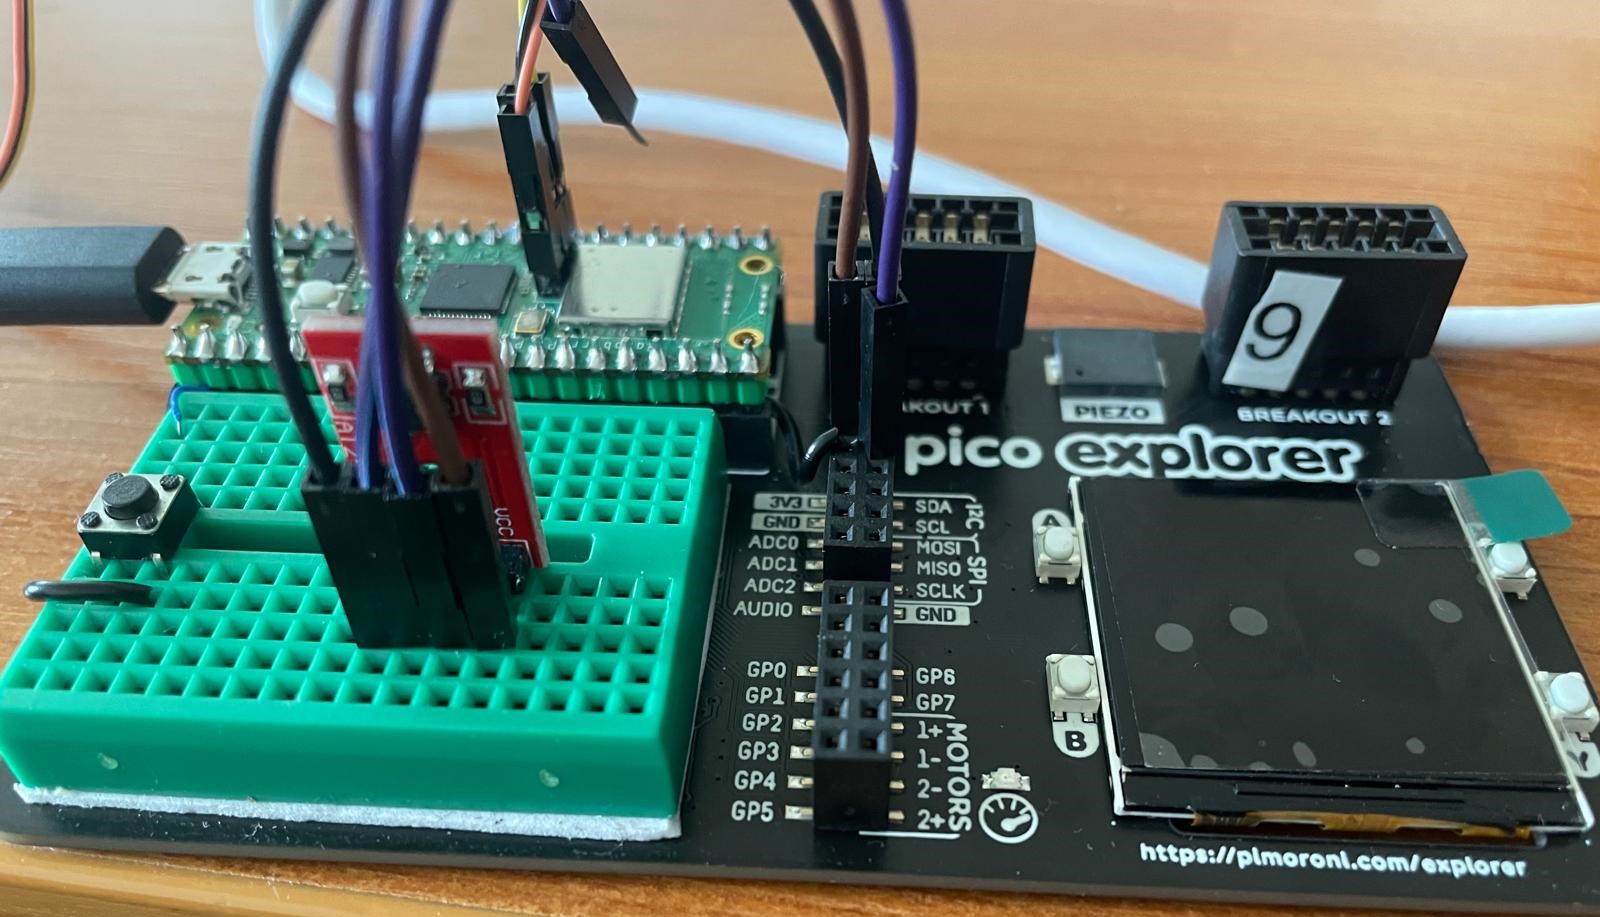
We are going to use I2C to write to the memory and in order to do that we have to connect the SDA and SCL pins correctly, as well as the others.
#![no_std]
#![no_main]

use embassy_executor::Spawner;
use embassy_rp::{bind_interrupts, i2c::{Config as I2cConfig, I2c, InterruptHandler as I2CInterruptHandler}};
use embedded_hal_async::i2c::{Error, I2c as _};
use embassy_rp::peripherals::I2C0;
use {defmt_rtt as _, panic_probe as _};
use embassy_time::Timer;
use defmt::info;
We start off by importing the functions from the crates and we then have to define our panic handler for the communication:
bind_interrupts!(struct Irqs {
    I2C0_IRQ => I2CInterruptHandler<I2C0>; // I2C0_IRQ is the interrupt for I2C0
});
We then can go into the main function and setup everything we need. First, we initialize the peripherals as usual, then we define the pins and create the driver instance for the communication, which fortunately is done automatically by Embassy.
#[embassy_executor::main]
async fn main(_spawner: Spawner){
    let peripherals = embassy_rp::init(Default::default());

    let sda = peripherals.PIN_20; // PIN_20 is the SDA pin
    let scl = peripherals.PIN_21; // PIN_21 is the SCL pin

    let mut bus = I2c::new_async(peripherals.I2C0, scl, sda, Irqs, I2cConfig::default()); // Create a new I2C bus
I’ll now show you two methods for writing to the EEPROM. First one is:
    const TARGET_ID: u8 = 0x50u8; // I2C address of the target device

    Timer::after_secs(2).await;

    let mut tx_buf: [u8; 5] = [0x00u8, 0x00, 0x11, 0x20, 0x11]; // Buffer to store the data to be sent
    bus.write(TARGET_ID, &mut tx_buf).await.unwrap();
This function also takes 2 parameters:
- the address of the target we are attempting to transmit the data to
- the transmitting buffer that contains the data we want to send to the target
The TARGET_ID is the address of the EEPROM and it’s something immutable, it’s specific to each model.
Second method is using write_read:
    let mut rx_buf: [u8; 2] = [0x00u8; 2]; // Buffer to store the received data
    bus.write_read(TARGET_ID, &[0x00, 0x01], &mut rx_buf).await.unwrap(); // Write 2 bytes to the target device and read 2 bytes from the target device
This is just if we want to perform both a write and a read, one after the other.
Now for the rest of the code it’s pretty much the standard:
    info!("{:?}", rx_buf); // Print the received data
    loop {
        Timer::after_secs(1).await;
    }
}

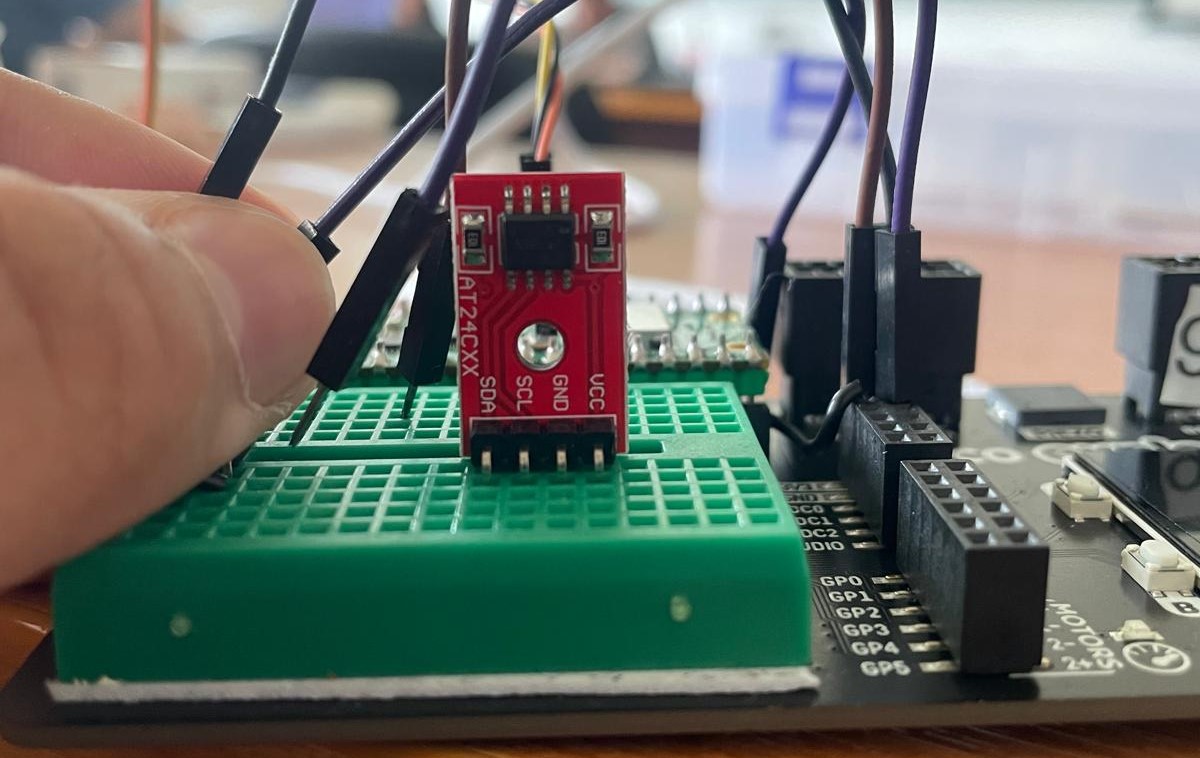
Here’s the pinout for the memory if you’re curios.

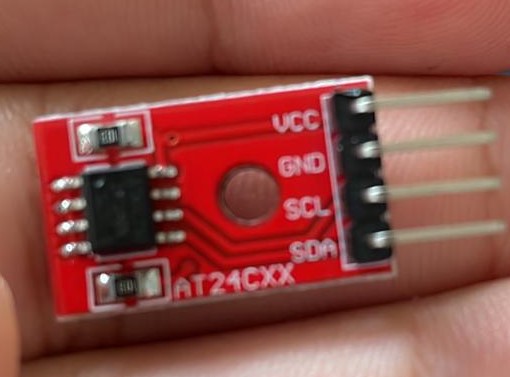
And here’s a more detailed picture with the model of the EEPROM.

Second task
Using the embedded_graphics crate, write a centered message of “Hello, IPW!” to the LCD.
For this we first have to initiliaze the SPI Controller that connects to the LCD. For this part, I’ll leave the code down below as I don’t really know how to write drivers myself either.
#[embassy_executor::main]
async fn main(_spawner: Spawner) {
    let peripherals = embassy_rp::init(Default::default());
    let miso = peripherals.PIN_4;
    let display_cs = peripherals.PIN_17;
    let mosi = peripherals.PIN_19;
    let clk = peripherals.PIN_18;
    let rst = peripherals.PIN_0;
    let dc = peripherals.PIN_16;
    let mut display_config = embassy_rp::spi::Config::default();
    display_config.frequency = 64_000_000;
    display_config.phase = embassy_rp::spi::Phase::CaptureOnSecondTransition;
    display_config.polarity = embassy_rp::spi::Polarity::IdleHigh;

    // Init SPI
    let spi: embassy_rp::spi::Spi<'_, _, embassy_rp::spi::Blocking> =
        embassy_rp::spi::Spi::new_blocking(
            peripherals.SPI0,
            clk,
            mosi,
            miso,
            display_config.clone(),
        );
    let spi_bus: embassy_sync::blocking_mutex::Mutex<
        embassy_sync::blocking_mutex::raw::NoopRawMutex,
        _,
    > = embassy_sync::blocking_mutex::Mutex::new(core::cell::RefCell::new(spi));

    let display_spi = embassy_embedded_hal::shared_bus::blocking::spi::SpiDeviceWithConfig::new(
        &spi_bus,
        embassy_rp::gpio::Output::new(display_cs, embassy_rp::gpio::Level::High),
        display_config,
    );

    let dc = embassy_rp::gpio::Output::new(dc, embassy_rp::gpio::Level::Low);
    let rst = embassy_rp::gpio::Output::new(rst, embassy_rp::gpio::Level::Low);
    let di = display::SPIDeviceInterface::new(display_spi, dc);

    // Init ST7789 LCD
    let mut display = st7789::ST7789::new(di, rst, 240, 240);
    display.init(&mut embassy_time::Delay).unwrap();
    display
        .set_orientation(st7789::Orientation::Portrait)
        .unwrap();
    use embedded_graphics::draw_target::DrawTarget;
    display.clear(embedded_graphics::pixelcolor::RgbColor::BLACK).unwrap();
I’ll leave a link here with the code to the display function used in the code. Also, the crates + functions used are:
use cyw43::new;
use embassy_executor::Spawner;
use defmt::info;
use embassy_rp::peripherals;
use embassy_time::Timer;
use {defmt_rtt as _, panic_probe as _};
use ipw_embedded::display;
use embedded_graphics::{pixelcolor::Rgb565, text::Text};
use embedded_graphics::prelude::Point;
use embedded_graphics::mono_font::ascii::FONT_7X13_BOLD;
use embedded_graphics::mono_font::MonoTextStyle;
use embedded_graphics::Drawable;
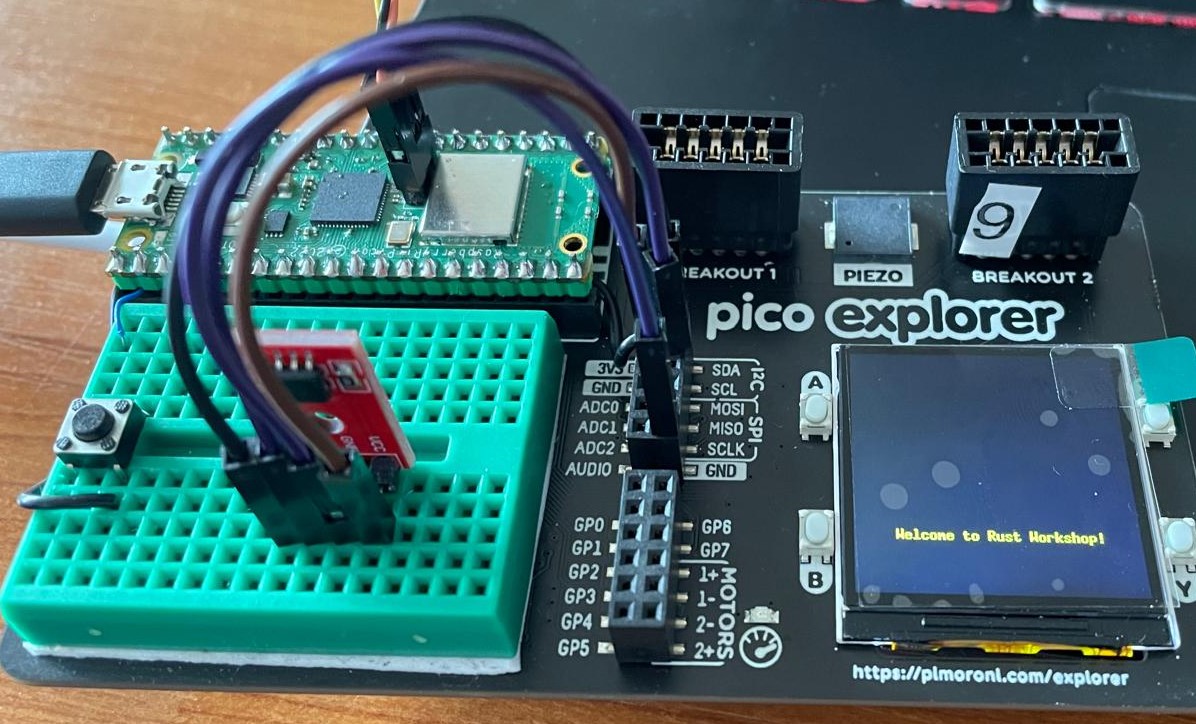
Now, for the last part, writing to the LCD is pretty straightforward, we have to use the Text function and also define the style that we are going to use. That consists of choosing the font and color which we want to write to the LCD.
let color = Rgb565::new(255, 255, 0);

    let style = MonoTextStyle::new(&FONT_7X13_BOLD, color);
    Text::new("Welcome to Rust Workshop!", Point::new(36, 190), style)
        .draw(&mut display)
        .unwrap();
}
The Point function only specifies the position where the string is located on the LCD. That’s all for this challenge, the hardest part is just understanding and managing to write the controller for the SPI yourself.

